Monday, May 30, 2011

The Finished Product: Chocolate Blueberry Cupcakes With Blueberry Buttercream Frosting

This cupcake stand is perfect!

The cupcakes were a success! Before the Memorial Day party even started mom was handing out cupcakes to everyone who came over early. Chris, our chef and neighbor-friend was the first of our guests to get a taste of blueberry decadence. I knew I could trust his opinion because he is also a foodie -- he makes excellent desserts and the most scrumptious grilled meat (he wants a restaurant, and I think "Smokin' Ass" would be the perfect name for such an establishment! He says pork butt, I say pig ass--potato, patato). Anywho, he loved the cupcakes! He said they were so smooth -- the cake was moist, the frosting creamy. He said it was like ice cream! The blueberry flavor wasn't overpowering either; there was a perfect balance between chocolate and blueberry -- and it wasn't too sweet.


Regular sized cupcakes and their mini counterparts.


I can't count the number of times I heard, "I've never been a fan of blueberries, but this is delicious!"


Joe's reenactment of his first bite--I think he liked it...Ed too. 

Auntie Shelly's eyes rolled up, Ed said this was his first taste of a gourmet dessert that actually tasted gourmet. *smiles from ear to ear* There was a chorus of aaahs and mmmmms and "ohmygod you have to try this." 

I offered Joe another mini cupcake after Ed took his, and he said, "Oh, no, I want a big one." :) That is a good sign of a delectable cupcake!


What a lovely cupcake


Even the kids liked them! That's quite the compliment when a younger person enjoys the fruity flavors, and not just the chocolate-y deliciousness.


The purpley color in the frosting perfectly complimented the luscious brown of the cake, and it was all pulled together by chopped chocolate covered blueberries (juice, really) and a perfectly sweet blueberry.

Even if you are not a fan of blueberries, I can assure you that you will like these! MMmm!

Sunday, May 29, 2011

Chocolate Blueberry Cupcakes

Oh, you want to take a picture of me? *Smile*
The other day mom and I came up with some completely new and original cake/cupcakes recipes, and I have been itching to try one of them out. Luckily this is the perfect time of year, and this weekend we are celebrating Memorial Day -- and you know what that means: FOOD! I elected to make one of my new creations -- Chocolate Blueberry Cupcakes! I decided on cupcakes instead of a cake because quite frankly, they are easier. I'm still not sure of designs I would do on top of a cake, so before I put something out there I want to have a good idea! And people love cupcakes. This will also allow me time to see how my creations work out before making a whole cake!

Bobbing blueberries.


To add to the overall wonderousness of this cupcake, I also decided to make a blueberry filling (I hope you like blueberries!); a very simple sauce that is so incredibly luxurious that I could have stood over the simmering blueberries for an eternity. The blueberries were kind of ugly at first. They insides are clearish, and when the skins started popping the insides started oozing out. BUT THEN. With the roll of a boil the bluish-clear started to turn into a deep gorgeous purple. And I tell you what. I have never smelled something so fantastic! I have always enjoyed blueberries, but they were never my favorite, love them to death berry. Well, I think I'll be singing a different tune from now on. Mmm!

This picture doesn't even do justice. It was gorgeous.

I made the batter yesterday, a wonderful chocolate recipe I have with a little surprise mixed in for a delectable kick! A kick in a good way that is. Your taste buds will be buzzing with glee! To top it off I made a blueberry buttercream frosting (this also has a little surprise in it, which was mostly meant to add to the color, but it gives the flavor a decadent taste).

Ready for the oven.


I could not have been more pleased with my cupcakes, too! I sang to them while I was mixing (Sade, Esthero, Michael Buble, the goods), and I think they liked it because they baked perfectly! As much as I bake all the time, I have never had cupcakes come out perfectly rounded, and just plain--perfect! There is something to be said about sending love to your food.

Absolutely perfect!


Tomorrow I'll post more pictures of the final product, and what my foodie friends thought of them! Stay tuned! :)

Friday, May 27, 2011

Business Cards For The Farmers' Market!

I haven't told you all yet, but mom and I are in the process of getting our kitchen inspected so we can start selling our decadent baked goods at local farmers' markets! Some of these pictures may look familiar as I have posted most of them before. I share my favorite things with you, and I want to share my favorite things with potential customers!

Picture #1 - We do cakes/cupcakes! Chocolate Lavender cupcakes
 Anyway, this means that we need to get business cards in the works so people will want to buy and come back again and again! I have a fabulous aunt who made me a set of wonderful business cards. She even put a picture of Christmas cookies, a set of three snowmen, on these cards. Now, I need some cards that can be used all year, and aren't holiday specific. They are so cute though. (I had heard that lavender is delicious, and I wanted to try it out! Chocolate and Lavender is indeed delicious!)

Picture #2- we do pie! Banana Toffee pie
I was having trouble thinking of what to put on my cards -- I really wanted to make a still-life of cookies, bread, cake, cupcakes, etc. The more I thought about it the more daunting it seemed. That's a lot of baked goods to make that will not have a home... My co-workers can only eat so much sweet stuff! And then I had an epiphany! I hosted a Pampered Chef party last summer, and the woman who would be the presenter offered me her business card. When I went to take one I noticed that the one under it had a different picture on the card. I looked at all of them, and saw four different pictures on four different cards.
Picture #3 - we do cookies!
It hit me! Instead of putting absolutely everything on one card and making a heap of food, I can get pictures of food I have already made and make four different cards! If I mix them up people will notice and keep looking through and be amazed at the pictures of the food I make! Stellar idea. People can't resist a pretty picture; I know I can't! (These cookies were made for a charity event I attended in November -- Banana Oatmeal, Chocolate Cherry, Sugar, Almond wafers, and Peanut Brittle.)

Picture #4 - we do bread! Cinnamon-Raisin bread
Most of the food was made just because I wanted to try something new, and once I know what I can do I end up making replicating the greats for parties, as gifts, for myself! The Cinnamon-Raisin bread was made because I wanted some delicious bread that I didn't have to buy. I found a recipe, made serious adjustments, and loved the final result. I make it all the time!


These are only samples of what Mom and I will be creating! We are planning on selling in these four categories, and only a couple within each, to start. Once we see what sells and what people are looking for we will add more!


Any comments/suggestions would be greatly appreciated. I want people to want to take a card (and use it in the future!) so tell me if you would take any of these cards.   

Would you want to buy these products?

Friday, May 20, 2011

Banana Toffee Pie With A Side of Almond Coconut Gelato

Last Saturday my aunt graduated with her Bachelor's degree (along with many of my friends!). For such a special day we absolutely had to have a celebration, and because it is such a wonderful accomplishment I told her I would make her any dessert that her heart desired -- anything from simple to incredibly difficult. I will make anything! We both came up with options -- she scoured the internet, and I perused my books. She wanted something tropical, fruity. She found a recipe for Almond Coconut gelato, and since gelato is not substantial enough for a dessert I found a recipe for Banana ToffeePie. She liked the combination, and it was a go! 
It was a touch wet on graduation day.
 This was all arranged a week before the big day, and I was so excited about making these decadent desserts. The week had other plans for me though. I had thought of making the gelato and pie on Thursday, but I really like my desserts to be freshly made--the closer to the day needed the better. I personally couldn't make anything on Friday because I had to work (pesky transfer students!), and then I had a wedding to attend Friday evening. This left no time! After consideration mom and I decided that the pie absolutely needed to be made the day before and not a second earlier -- bananas, people! They can get slimy, brown, and just plain gross.

Sweet, sweet caramel!
 Mom, bless her heart, was left to make absolutely everything completely on her own. This wouldn't be an issue except that she enjoys making tried and true dishes whereas I'm always picking out recipes that I have never made before, and they are generally a little more complicated. They might just have steps that we have never done before -- and this Banana Toffee pie was filled with that! And so was the gelato. Sigh. She, like the trooper she is, agreed to make everything regardless of how intimidated she might be by the complicated steps in the recipes.

The pre-baked crust of the pie is made with graham crackers, butter, and a variety of spices. Then there are a couple of layers of banana slices, and topped with caramel. My. God. I cannot even describe the heavenly deliciousness that is the caramel. The way it's made: three cans (which was actually one can too many) of sweetened condensed milk. You put the cans in a vat of boiling water making sure that the cans are completely covered. Then either simmer or boil (I, erm, don't remember which...) for two hours. This loose milky substance, after two hours in a wonderful bath, turns into this thick, creamy, smooth, caramely caramel! I am not a milk person, and even though I knew it was sweetened I was wary of tasting it for fear of vomming everywhere, but I took a spoon to the silky decadence.....and went to caramel heaven. Holy hell. Even if you are not making this pie, you should make this caramel. Just do it. You can put it on anything -- pie, ice cream, your body. It can't be wrong. Anyway, this caramel tops the bananas, and that is topped with chocolate shavings. Then cream is whipped into submission (I think this might be a Julia Child quote), and then is topped with more chocolate

An incredible Banana Toffee Pie.
shavings. Delicious. Utterly spectacular.This is one of the most amazing pies I have ever eaten. If you come to my bakery I will make it for you. Or, just give me a call and I'll make it for you!

I was not terribly impressed with the gelato. Mom did an excellent job, but I think the recipe was kind of crappy. It did not call for putting the gelato in an ice cream maker (which is what makes the cream so smooth). Mom followed the directions and put the cream in the freezer just like it calls for.
Almond and Toasted Coconut gelato
It turned out crystal-y, and I wasn't terribly impressed by the flavor. Or maybe it was just that I was having a relationship with my pie.It looks pretty and decadent. Next time it will definitely go in the ice cream maker! Only smooth, luscious gelato!

So, thanks mom, for making everything, going out of your comfort zone, and for making delicious treats for us...especially after I said I would do it all...my mom is the best.

Sunday, May 15, 2011

Banana Coffee Muffins For The Rons

The other day I was driving home from visiting some family when I noticed that the battery light on my dash was bright red. The Rons (the most amazing mechanics that ever existed--a father, son team) told me once that if something lights up in orange it isn't necessarily good, but it can wait a hot second. However, they said that if one of the lights are red that is definitely not good.

If you only have a few muffins to bake, put them in the middle and fill the rest with water for even baking.

Crap. I pulled into a parking lot, gave them a call, and explained my situation. Father-Ron told me to bring it in immediately and he would take a look at it. I drove it the couple of miles distance to the shop and prayed to baby Jesus that my car wouldn't decide to kick the bucket in the middle of an intersection. Well, my prayer and happy thoughts worked because Rosalie and I made it to The Rons' in one piece. Whew. Father-Ron was there, and said he would be able to look at it the next day. Before I left he made sure someone was coming to pick me up. I told him mom was coming to get me, and went outside to wait. At that moment I decided that mom probably wasn't coming to get me because our communication via text messages was nothing short of dodgy -- my phone decided to only accept emergency calls after I had talked to Ron so I couldn't tell her what was going on. This time I was able to call home, and she came to get me. Except that it took forever and it was sweltering outside.

Fill about 3/4 full for perfect muffins.
I stood in the shade outside of the shop for a while. Then Father-Ron went outside, noticed me, and told me I could sit inside. I decided to stay outside, and a few short minutes later he came outside again and offered to buy me a coke from the vending machine on the other corner of the building. He waved me over, got out his key, and let me pick my drink. He is so kind, and I was utterly grateful as it was the first day that was really hot. And it was so refreshing! Well, after all this kindness I decided that I would make them something delicious to show my thanks. When Ron and I were at the vending machine he told me that he drinks coffee all day, so I decided to make them something with coffee in it. Muffins with coffee.... I googled it, and it turns out that such a thing exists! I had no idea. So, I made them, with bananas, and they turned out so good. They didn't have much of a coffee flavor to it, but I have an explanation for that. I used instant coffee, and when we had the proper amount all figured out, it ended up looking like sludge (and smelled about the same), so I added a lot more water to even it out, and therefore must have taken a lot of the coffee flavor out.

Fresh from the oven!
Anyway, they were delicious, and The Rons were happy to see them the next day. I felt sort of silly handing them over, but I handed them over to Ron (the younger), and he seemed pleasantly surprised -- I mean, who doesn't like coffee in muffins? I also added chocolate chips to make them extra delicious. I think it called for some sort of nut, but please. Nuts or chocolate? Ron (the younger) laughed at being sufficiently caffeinated to work on the next car. So, I'm not sure what they ended up thinking about them, but I was pleased. The muffins were dense, moist, and flavorful -- scrumptious.

Perfect muffin on a cranberry plate.

Monday, May 9, 2011

Latin Lace Florentines For Mother's Day

Latin Lace Florentines


This year for Mother's Day Mom and I got together with Grammy. After consulting on how to spend the day we came up with a casual day at home, grilling, and chilling. It was only the night before that I decided to come up with something fabulous for these two special women in my life. Mom and Grammy are both trying to lay off the sugar and sweets (NOT while I'm around!), but this is a special day, and once I saw the recipe for these Latin Lace Florentines, I knew they would be the perfect treat for the day (and mom agreed).
 
The  night before I was leafing through my Great Big Butter Cookbook when I happened on the same page a couple of times. I have to admit that I am a picture person -- if the picture is engaging you have me hooked. The opposite is true if the picture is dull -- but this picture was anything but dull. Gorgeous, tiny, lacey cookies topped with a drizzling of chocolate in a dish of chili powder. Yes, you read that right, there is chili powder in these cookies! Mmm they are decadent. Anyway, I was smitten with the picture, had most of the ingredients, and decided to make them as soon as we brought Grammy home.

These are going fast....
  The assembly was sort of strange. First, you whisk all of the dry ingredients together, and then you pour all of the wet ingredients into the dry mixture and stir until completely combined. These are not the usual steps I take when making cookies, but I did as I was told. It worked out just fine...the machine was a little irritated, but the batter was completely mixed and delicious looking.

Now, here's one thing I encountered. For this specific recipe when it says to only use a teaspoon size ball on the baking sheet that is precisely the size you should use. And I don't generally advocate for tiny cookies. Like mom said: "I want my cookies to be the size of a plate, the size of my head!" I guess that's where I get it from. The first go around that is what I did. I have a cookie scoop that makes a decent size cookie. I noticed that this becomes a bit of a problem though when they were baking. There is a lot of butter and light corn syrup in these cookies, which means that as soon as there is any bit of heat the batter instantly begins to spread out (putting the dough balls three inches apart is also a good idea! These cookies spread out!). Because the edges were spreading out and the middle was still mounded, the edges began to get really brown and the center was still under baked. For the next batch I decided on the tiny teaspoon, and I had much better results. When the cookies spread out there was no longer a huge mound in the center, so they baked pretty evenly. When the cookies come out of the oven you can tell where they get their name from. The big chunks of almonds and oats leaves gaps in the dough and makes the cookie look like lace! They are so pretty! And did I mention delicious? Oh, my. They are good.


Once all the cookies were out of the oven I melted bittersweet chocolate to drizzle on top of the cookies. Bittersweet chocolate was the best to use because it perfectly complimented the sweetness of the cookie. Semi-sweet chocolate would have been too sweet and masked the flavors in the cookie -- cinnamon, chili powder, mm! Decadent.


Once the chocolate was drizzled over the tops of all the cookies we dove in (well, we dove in way before then, but this was the first time we would taste the final product). Everyone thought they were delicious! And gorgeous (even Shawn can't keep his paws of of these elegant treats). They were the perfect cookie to make for a day honoring mothers; the cookies are dainty, lacey, elegant, and delicate. Perfect!


A variation of these are definitely going in the bakery.


What did you do with the special women in your life on Mother's Day?

Thursday, May 5, 2011

Night Four of Cake Decorating

Last Thursday I had my last cake decorating class. For our final class we had to bring in an already made and perfectly frosted cake. Fun! More practice time! Since I had left over strawberries I decided to make my Strawberry Champagne cake again, and this time I would perfect it. I made it for Easter, and it did not go as well as planned. This time I would make a well so the strawberry juice would not leak out of my cake and make a hot mess. This will work, and I'll have a perfect cake! I got to town making my cake and it turned out perfectly (of course). Once it cooled down I used the left over strawberry buttercream frosting I had to use between the layers. Then I made my very deep well, and added cut strawberries. No juice is getting out this time!

For this class we are supposed to make the criscocream frosting....I ended up making my usual buttercream frosting because I really wanted to eat the cake! I put my top layer on top of the bottom layer and went about my business frosting my cake. I used the 16 inch featherweight piping bag and the appropriate tip for frosting the edges of the cake. I should have known I might run into some issues when the frosting didn't stick to the cake. This same thing happened to me and the other students in the class, so I didn't think long about it, and promptly dismissed the idea. I did notice a problem though when I kept getting a bulge around my cake's middle even after I had smoothed everything out. I probably fixed it up a good four times.....and then the streams appeared. NO! Crap. After trying to patch up the cake with little success I opted on removing the strawberries. Yes. This means that I scraped out the oozing middle as far in as I could get (mixing my pink middle frosting with my cream outer frosting). I then had to pry the two glued layers apart. This was an interesting task. I scraped the melting strawberries off the gooey middle, and scraped off a lot of the pink frosting just to be sure to get most of the juices out. Then I smushed the two layers back together, and attempted to fix my white frosting. Luckily there was just enough. Unfortunately the strawberries did quite a bit of damage as I found out when I took the cake out of the box when I got to class. I assume the cake should not look like this:

This is my final product -- trying to make something  out of it.
Lesson learned: never ever ever. Never! EVER EVER! use fresh fruit in between layers of cakes if you do not want an avalanche of frosting. Instead: make a sauce out of whatever fresh fruit you want to use! This is thick, stays put in its' well, and does not create streams! This is the route to go. I assure you. The instructor did tell me that my frosting was perfectly executed...it was just those strawberries.

Anyway, on our last night we learned how to make roses! This seemed an ominous task especially when you see what the tip to actually make the rose looks like. How in the world?! But she showed us, we were scared to try, and then we all had a pleasant surprise when we attempted our own rose. The final products looked like roses! Might sound silly, but I was expecting it to look like some ugly thing, but it wasn't! It was so pretty.


For our final hour or so we were to replicate one of the cake designs from our Wilton plan book. I had thought that I didn't want to make one with roses because the roses in the book are so awful looking, but now that I had pretty, delicate pink roses I wanted to cover the entire surface in them! I picked a cake and put my roses on, then made some leaves to fill in the spaces (which look completely natural). I could not have been more proud of myself. The (top, anyway) looked so impressive. Everyone was inspecting each others' cake designs and oooing and ahhhing at how wonderful they looked. It turned out to be the perfect last night.

These roses were so much fun to make!

The top of my cake is so pretty!
Hopefully sometime in the near future I'll take the next step and take the class on working with more flowers and cake design. We'll see, and I'll keep you posted. :)

Monday, May 2, 2011

Night Three of Cake Decorating

On my third night of cake decorating I learned how to make different types of flowers. First though we were instructed to bring pre-made cupcakes (I brought the leftover Red Velvet cupcakes from Sue's shower). She then showed us how to frost the cupcakes. For this particular design we used a star tip and a 10 inch featherweight piping bag with the white Wilton recipe for criscocream. You can use one of the nails the Decorating Basics kit comes with (and your cupcake might in fact fly off of it and go splat), or you can set it in front of you. The point is to cover all the showing cake with frosting, or "the good stuff" as defined by Rita, our instructor. I personally like a little bit of the cake showing; it shows the pretty contrast between the cake and the frosting, especially if you have a red cake and white frosting! But, to each her own. When ready, hold the piping bag at a ninety degree angle, and start at the edge of your cake. Make a complete circle around the edge of the cake, and when you come back around go up slightly on the layer you already made. Keep circling around until the cake is covered. When finishing, stop the pressure on the bag and lift off. If you keep pressure going you will not have a neat little star shape. It should look like this:


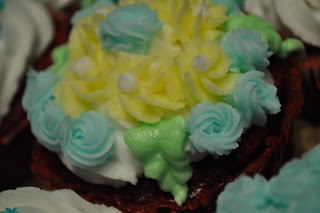
Once our six cupcakes were properly frosted we learned how to make shaggy mums, drop flowers, rosettes, and shell boarders. These were all so much fun! Here is a picture of the first flower that we made:

Crazy flowers that were fun, but I will probably never make again.
Mine ended up turning out kind of funky because the frosting was so stiff--it kept sticking to the tip, and refused to let go! Rita told us to not ever use the stiff frosting recipe because it's more like sticky paste, and completely non-malleable. The medium consistency is better, but ours definitely needed to have more water added to it! Anyway, they were fun to make, and everyone really had a ball making these. The one woman had a wilted flower. Instead of the "petals" sticking up, they were sticking to the bottom, and really did look like dead flowers. She worked hard though, and got some beautiful flowers at the end. 

Drop flowers, rosettes, and leaves
The next thing we did was learn how to make a drop flower. You use one of the star tips, press it to the cake, use enough pressure so that the frosting makes lines in the shape of a flower, stop pressure, and finally, lift off! This gives you a lovely flower. With one of the smaller round tips, you can add a dot of frosting to the middle, and make a gorgeous flower! The technique is basically the same for the other variation of the drop star. The only difference is to extend your arm so that it is parallel to your body. Once you have the flower shape starting to form, you turn your arm so that it is perpendicular to your body. this make a little ruffle to your flower. Again, you can use a round tip to make the center of your flower. 

Rosettes and leaves
Rosettes were very similar to the motions of frosting the cupcake. You make a blob in the center of your potential flower, then swing your arm up, to the right, and then finally swinging around to the left. It makes a cute little rosette!

This class was so much fun. I think making leaves was my favorite. The look rather difficult to make, and the tip seems ominous, but it's so easy! I can definitely see myself making these flowers and leaves again. 

I think I added all but one flower to this cupcake. A hodgepodge of everything I learned!