Tuesday, August 9, 2011

The Reconstruction Of Meals: A Chicken & Veggies Tale

After all the baking I've been doing lately, I decided to take a break and make a meal for dinner. I bought a chicken at the United Methodist Church of North Chili's farmers' market a week or two ago. I love making a savory meal, and the thought of a whole chicken was too good an opportunity to pass up. I bought a three pound little guy and brought him home to dress him up. The next day he was allowed to thaw, and once all his ice crystals had melted I was ready to start my culinary adventure.

I decided to make a roast of the event. I would put the chicken in the middle of a giant roasting pan and put carrots, potatoes, celery, onions and whole garlic cloves in the surrounding space. I put a season of Gilmore Girls in (my go-to cooking/baking show for background noise), and I got to work cleaning and chopping all my veggies. Once they were all properly cut I threw a little oil on. This helps the potatoes to keep their color and not turn brown, and also make the really good stuff stick. Next I got out jar after jar of herbs, parsley, thyme, oregano, seasoned salt, onion and garlic powder, salt, and pepper, and maybe a few others. I poured about a teaspoon on each herb into my palm and then rubbed my hands together over the veggies. Breaking the leaves releases the oils from the herbs and makes the smell and flavor much more intense and wonderful.

Next I prepared the chicken. I forgot to do this, but it would be wise to slather your chicken in butter or oil. I prefer oil. I put butter on a turkey last Thanksgiving and let it rest over night. The butter had hardened and was so disgusting. I couldn't help but think of my arteries. Oil doesn't do that though....so that must mean my arteries are fine, right? Yes. Anywho, slather the bird in oil (gives it flavor and stickiness), then bring out your herbs and other seasonings and sprinkle generously. I am a huge fan of lots of flavor, so don't be shy. I'm not. When it comes to seasonings.
I put herbs, carrots, onions, garlic, and grapes inside to give fab flavor.

Once your chicken is sufficiently prepared, put him in the middle of your roaster. Scoop up the seasoned veggies and assemble around the bird. Look up how much time a bird needs to cook by how much it weighs. Mine was supposed to cook for an hour and a half to two hours.

The chicken was gorgeous, golden brown and smelled like an herb garden on fire. The veggies could have cooked a bit longer. I got a little over zealous with my veggies and had them a touch too crowded. I imagine they would have baked better if they had been one layer and not piled on top of each other. Overall though the flavors were out of this world! So incredible!

After eating I had a ton of leftovers..I'm good at getting carried away with food. So I decided to make a soup out of the leftovers. Ina Garten says this is the best thing to do with leftover roasted veggies, and boy does Ina know what she's talking about. I pulled the rest of the meat off the chicken and put all the extras in a pot of water with lots of bouillon. I added some frozen peas and corn to the mix, let it simmer until the veggies were finally cooked through, and voila! A new meal!
 This is what I love about cooking and baking. You can be creative, think out of the box, use your imagination, and throw caution to the wind! Especially if it is just for you and close family who won't judge your flops too harshly; it's the best! And it's even better when your creations turn out magnificently, as this creation did, and people ooo and ahhh over their meal. I love it!

Wednesday, August 3, 2011

I Love Bread!

We use a lot of bread pans.
I love bread. All kinds of bread. Ever since I was a tiny tot baking bread has been a part of my existence. My mom is always making bread for toast in the morning. When I was in college I started having weekly dinner with Grammy, and as soon as I walked into the downstairs entryway of her apartment I could smell the savory perfume of the dishes she had labored over. A couple of times that included bread. There is nothing better than the smell of the yeasty dough rising, and the turning of squishy dough to soft bread while it's baking.

                                                          
Cinnamon Raisin Bread all rolled up.
My favorite bread to make is the most complicated one I could choose, but it turns out so incredibly good. The time and trouble is so worth the effort. My cinnamon-raisin bread is the best. For sure. I use a ton of cinnamon and other secret spices, which gives the bread an incredible flavor.It's my favorite for breakfast.

Dill Garlic Bread looking rustic and delicious.


I have also been making a new bread. I took a simple wheat bread and added a ton of dill from the garden, and then I sauteed a ton of garlic. Add to simple bread recipe and you have a knockout bread. People say they overdose on it. In the good way. The smell is intoxicating, too.

This is what happens when you bake with love <3


When I'm baking it is my wish to put as much love into my creations as I can. You can tell the difference between something that has been made from a home kitchen, with love, and something that has been made via robots in a factory. The pizazz just isn't there, but it's in my kitchen! And I put all my love into my products. 

Tuesday, July 26, 2011

Decadent Chocolate Cake For a 50th Birthday Bash

This year my uncle turned 50! Quite a milestone to reach! Mom and I were asked to create a scrumptious chocolate cake (and chocolate frosting!) for this special day. Mom found this awesome recipe from Tyler Florence, and gave it a go a couple of days in advance. It's a good thing she did because she followed the instructions just as they were printed, and this resulted in a semi-disaster. No matter who says it, do not fill the cake pan any more than half way full! Want to know why? The cake rises as it bakes in the oven. When there is not enough room for the cake to rise properly, it spills over the edges. This means you have cake batter stuck to the bottom of your oven. And the next time you use it you'll think the house is burning down. Not to mention that it ruins the cake, making it all funky looking. So. Mom made the cake again and only filled it halfway up the edge of the cake pan. And this time, you might ask? Perfection! The cakes rose perfectly to the top of the cake pan, not over, and were perfectly flat across the top (she also used the decorating needle in the middle of the cake as well as the baking strips that go around the cake pan).

yum.

The plan was to decorate the cake after a long and busy Saturday, but that just didn't happen. Instead, we gathered up supplies and brought them to the party with us. Almost the whole family was able to be there and we had a scrumptious dinner out. I had a caramel appletini with my dinner. Must figure out how to replicate. It tasted like something between hard cider and a candied apple. So. good.


Looks good enough to eat!

Anyway, back to cake, I made chocolate buttercream frosting. My. God. I infused my trusty buttercream frosting with a bit of cocoa powder, and it was incredible! I helped mom assemble the cakes, and she frosted them. She is so much better at frosting, and I really haven't the patience for it. She doesn't seem to mind doing it, so it works out pretty well. Her piping is really coming along, too! The shell border was perfect! So professional! Auntie Cheryl and Auntie Shelly got festive candles to put in the cake, so that was about it for decorating.

Only scraps are left.


Turned out fabulously! Uncle Jim's guests seemed pretty impressed, too. I heard people saying that it was the best chocolate cake they had ever had, and "where did you get this cake from?" Awesome. Another job well done!


All that was left were the remains of candles.

Saturday, July 16, 2011

Can I Offer You Some Cherry Pie?

This week mom and I made fifteen pies: Strawberry Rhubarb Apple and Cherry pie. Mom makes the Rhubarb pie all the time and it's my absolute favorite, but this time was the first for Cherry pie. We found a decadent recipe and dressed it up a bit for optimum flavor.

Gorgeous cherries!


I spent Thursday evening pitting the giant colander full of fresh cherries. I was expecting this task to take just about forever and a day, but I had hope that I would get a hold of the pitting technique quickly. I remember my dad saying that he cherries from the cherry tree in the yard with a paperclip. That did not sound all that efficient, so I had mom google another technique. Low and behold that is the technique that came most recommended.


Pitting cherries with a paperclip.


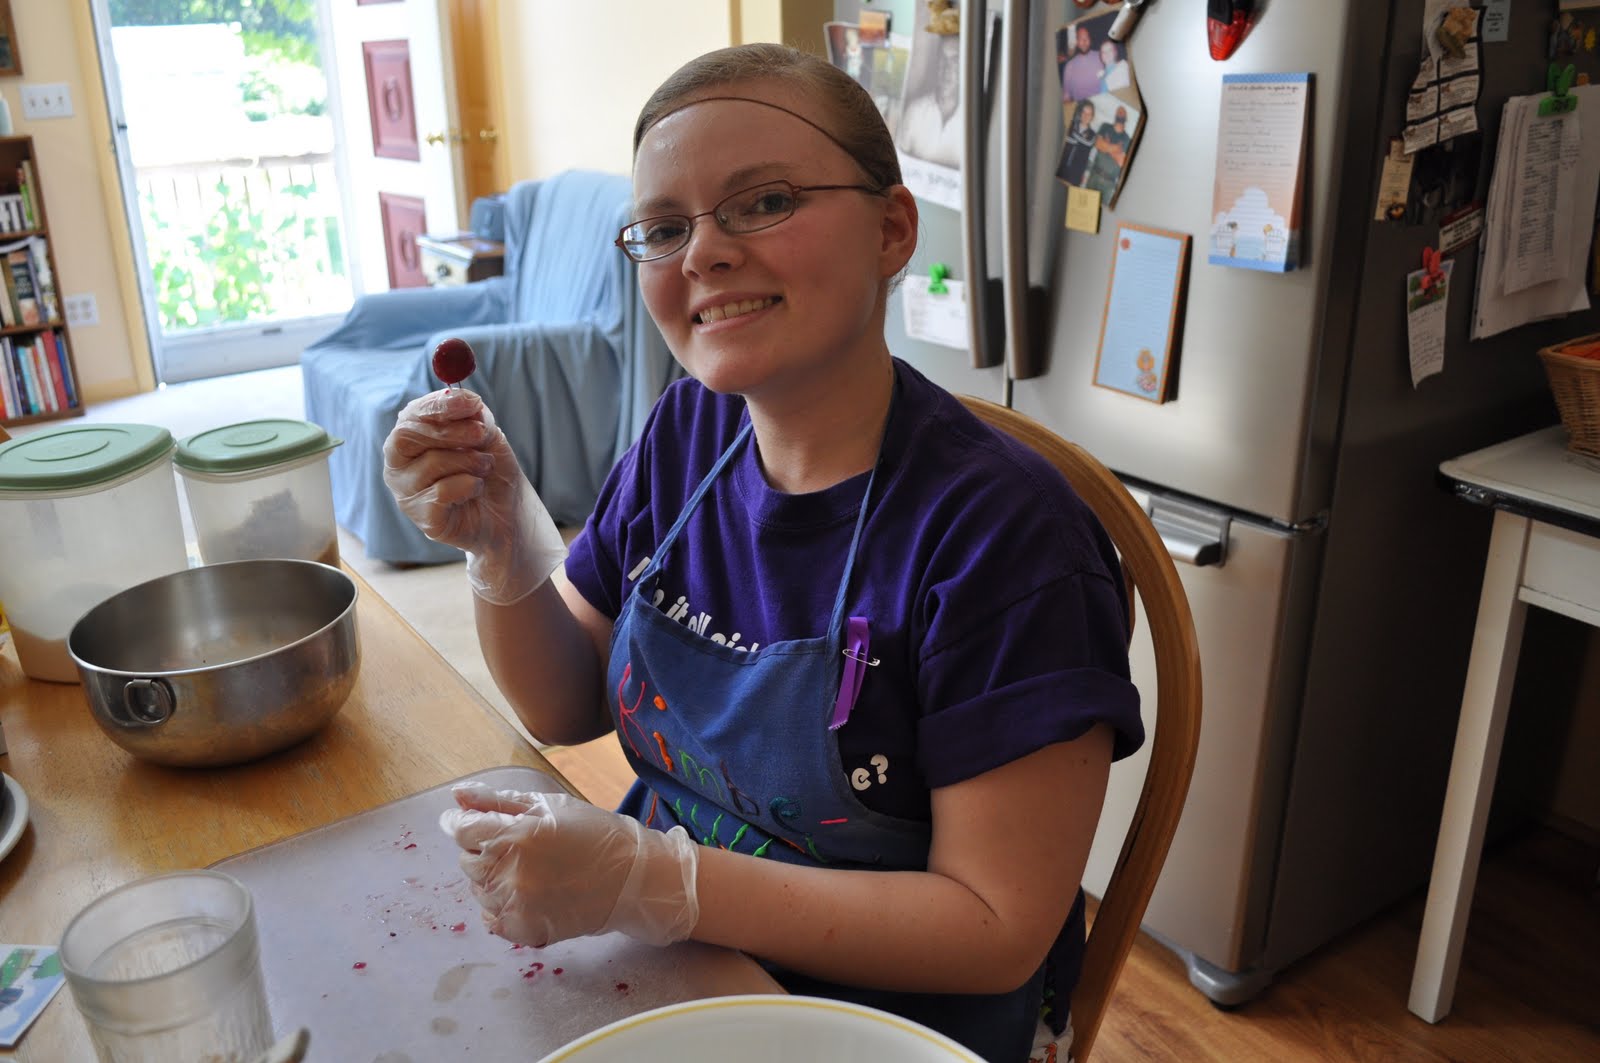
Mom got a small paperclip (also recommended) and I donned my gloves. Cherry juice can get everywhere and will stain everything. I used this tiny paperclip for a bit and about tore the cherries to shreds trying to get the pits out. I decided to try a bigger paperclip, and that did the trick! The pits came out easier, cleaner, and the cherries looked whole.


We need lemon juice!


Once the cherries were free of pits we made the pie filling. I really wish I had a cauldron. It would have been fabulous to reduce the cherries in a proper pot.


Cherry pie filling.
Anyway, the pot I had was filled to the brim with cherries, lemon juice, water, almond extract, and cornstarch for thickening. Once it boils, reduce to a simmer and continue stirring for an additional ten minutes. The sauce should be nice and thick and looks like a decadent syrup. Most of the cherries turned to mush, but the riper ones stayed more intact. I like this combination. You have more of a sauce, but you can still eat a whole cherry. It is cherry pie after all!

Pie crust ready for a pie tin.


Next I made an hour's worth of pie crust -- the most wonderful recipe. The crusts turn out so flaky and just incredible. Both the cherry filling and the crusts were left in the fridge overnight for optimum freshness. On Friday, bright and early, I started rolling out crusts and filling pie tins. I have to say the finished product was so sweet. Once I topped the pie with a crust I cut out little cherries and leaves to use as decoration for the top of the pie. People go crazy over this! They love the little personal touches, and I had a blast making them. The whole pie just looks cohesive and complete. I finished off the pies with a bit of egg wash.


In need of filling!
 
We had so much extra pie crust leftover that we didn't want to reuse -- I thought it might be tough and gross, so I decided to roll some of the used crust out and throw a dab of cherry pie filling into the center. Just to see. Well, they turned out kind of ugly, but holy crap! These little guys were incredible! And the crust was still flaky and decadent. That was a happy surprise! 


Pretty touches to cherry pie!


The pies turned out so pretty! We had two large pies and five mini pies. The little ones are so sweet, and they're perfect for singletons and couples. It's just enough to satisfy, and small enough to not sit on the counter/in the fridge and rot. They're perfect!

Saturday, July 9, 2011

A Savory Treat: Spinach & Ricotta Gnocchi

While I thoroughly enjoy all the sweet treats I make I am also very fond of baking food that is savory, too. After all, one can only take so much blatant sugar. Instead of making dessert I made a dinner out of spinach, ricotta, parmesan, seasonings, and binding eggs.


Making the gnocchi was much like making both filling of stuffed shells, and making pasta at the same time. I first combined the spinach, ricotta, parmesan, basil, parsley, salt, pepper, and nutmeg in a bowl, and once that was completely mixed I added flour until the batter was of a pasta consistency.


The dough with all its' speckles of herbs and seasonings is then rolled out into a long log shape and then cut into gnocchi pieces. I had absolutely no idea of what gnocchi is supposed to look like, so I found a video that showed me how. All he did was cut 3/4 inch pieces on the diagonal. He did a much better job of flinging them into a neat pile on the table with his knife than I did. Mostly my pieces stuck to the table. Perhaps I should have added a bit more flour.


Anyway, once they're all cut into precious shapes they go into a pot of boiling water (good to add a touch of oil so they don't stick together).


They only boil for a few minutes; once they start bobbing along the surface they're pretty well done. I didn't have any tomatoes to make a sauce so I just used a can (for shame, I know!), and it did turn out really well. The gnocchi with the tomato sauce topping tasted remarkably like stuffed shells -- so decadent!


I love that baking not only entails making desserts, but also making food that you can eat for a satisfying and healthy meal. If you have the right ingredients your baking adventure can be extremely good for you, whereas desserts are typically reserved for a sweet after dinner indulgence.


I love how versatile baking can be!

Sunday, June 26, 2011

Celebrating Legalization Of Gay Marriage In NY!


“Love is just love, it can never be explained.”
-James Earl Jones

The morning I found out the Same-Sex Marriage law was passed, I found a spectacular and most fitting idea for a cake. This cake has every color in the rainbow, and I couldn’t have found it at a more perfect time. In honor of this momentous day, I decided to make a mini rainbow cake.

Batter not yet colored.


The article calls for making an ordinary vanilla cake. After the batter is made, it is divided into five or six bowls (depending on how many colors you want). I decided to use red, yellow, green, blue, and purple. I know from making Red Velvet cake that food coloring can make the batter taste funky, and I also know that adding flavoring masks the strong flavor from the dye. I used cocoa powder to give the red and purple a deeper color, and to give the cake a bit more flavor.


Making purple: cocoa powder, blue, and red dye.

Once the batter is separated and the colors are mixed it is time to pour the bright rainbow colors into the cake pans. Purple is put in first because it is the outside color for my rainbow, and because it has the most batter. Pour it in the pan and give it a shake. This evens out the batter without leaving spatula marks, peaks, and valleys. Put in the next color, blue, now the most amount of batter of all that is left. Give that a shake, too, and it evens out—sinks into the purple and displaces it. Keep pouring the layers in and shaking them out, your smallest amount of batter going in last. It already looks like a masterpiece!

What a pretty rainbow!


Bake for 20-25 minutes. I ended up cutting the recipe in half and making two six inch layer cakes. A perfect amount for three people.


All the layers are in!

I was so impressed by the way the cakes turned out! They looked different from the picture I found, but then nothing ever turns out the same way you think it will, but they still looked great! Once the cakes cooled mom and I decorated the cake with buttercream frosting, sprinkles in a rainbow pattern, and silver balls of death (you can decorate your cake with them, but the label is sure to tell you not  to ingest them….). The cake looks perfect!


The finished cake.
So pretty!

I couldn’t have been more pleased when mom cut into the cake – the layers lined up almost perfectly, the top layer’s colors matching up with the bottom layer’s colors. This cake is the most beautiful cake I have ever made, for sure. Now I will admit that it was not the most delicious – that pesky dye flavor got in the way of the natural flavors of the cake, but it was gorgeous! I have been thinking of ways to make it not only beautiful, but tasty too. Perhaps almond flavoring or using naturally colored substances like blueberries, raspberries, etc. This would minimize the use of dye, and give the cake a natural flavoring.

That's pretty cool.


I am so happy with this cake, but I am even happier for my friends.The ones I love are now able to marry the ones they love – bring on the weddings, and if you need a cake, you know where to find me!
Gorgeous.


Monday, June 20, 2011

Caramel Apple Crisp Framed By Gorgeous Antique Dishes

My last post was about finding antique dishes in the thrift store, and today is all about what I made to put in them! And I used almost every dish during this adventure.

Milk turns to caramel in two hours!
 After I found my dishes I was inspired to browse through some food magazines, and lo and behold I found some decadent looking recipes! I cut a bunch out and left one to experiment with my fabulous finds. I found a Caramel Apple Crisp recipe, which is similar to a crisp Grammy made for our last party, except she used butterscotch. After tasting the splendor of that dish I thought I would see how one small addition, caramel, would change these similar dishes.
There it is!


The first thing done is making that gooey, scrumptious caramel! In a water bath for two hours at boiling temperatures in an old pot. I recommend not using nice pots and pans for this task because there will be a black ring that requires elbow grease to get it off; use an old pot.


Mushing butter, oats, and spices.


I then got out my new clear bowl and mixed together the oats, flour, cinnamon, and cloves (I add cloves to  everything!), and then I squished in chunks of cold butter. I absolutely love the aroma of spices mingling together -- mouthwatering!

Piling on the layers.


You pat half of the mixture into your lovely blue and flower decorated Fire King casserole dishes, and cover with apples, caramel, and the oat mixture (repeat until just the oat mixture remains on top). You then have a gorgeous, aromatic dish to pop into the oven for 40-45 minutes.


Holy cow.


 Mom had also made vanilla ice cream with caramel swirled in it (we're using up ingredients if you haven't guessed). Nothing like coordinating your dishes! It looks so pretty and the flavors carry over from dish to dish. Holy crap, it was delicious!


 Remove crisp from the oven when a fork pokes through the apples without resistance; they're done now, smelling sinful, and calling my name.

I love these dishes!


Gorgeous dishes for a pretty dessert! A perfect fit, too!
Perfectly done!


I let the crisp settle for a minute, and then dug in. I broke out a brand new (well, to me anyway) cranberry glass bowl. I found this bowl just the other day at an antique store. I have a couple of dessert plates in this gorgeous color, but no bowls. Until now!
The marigold glass perfectly compliments the caramel.

 Hello, gorgeous! So delicious, too. There are some things I would change about the recipe, but all in all it was a wonderful find. Easy to assemble, too, which is nice when you want to whip up something incredible in a timely manner. This is your go-to guy. So good. And I love my addition of cloves. I think they make everything better, even when the dish is magnificent without them. Cloves elevate the class factor in my own personal opinion. :)
New cranberry glass bowl!

I have never been a fan of mixing ice cream with other desserts -- I do not like soggy cake...gross. I do have to say though that for this specific dish, the two should most definitely go together. The vanilla from the ice cream combines with the spices, oats, and apples, makes for happy taste buds! And the oats and flour stand up against the melty ice cream making this a wonderful after dinner dessert.